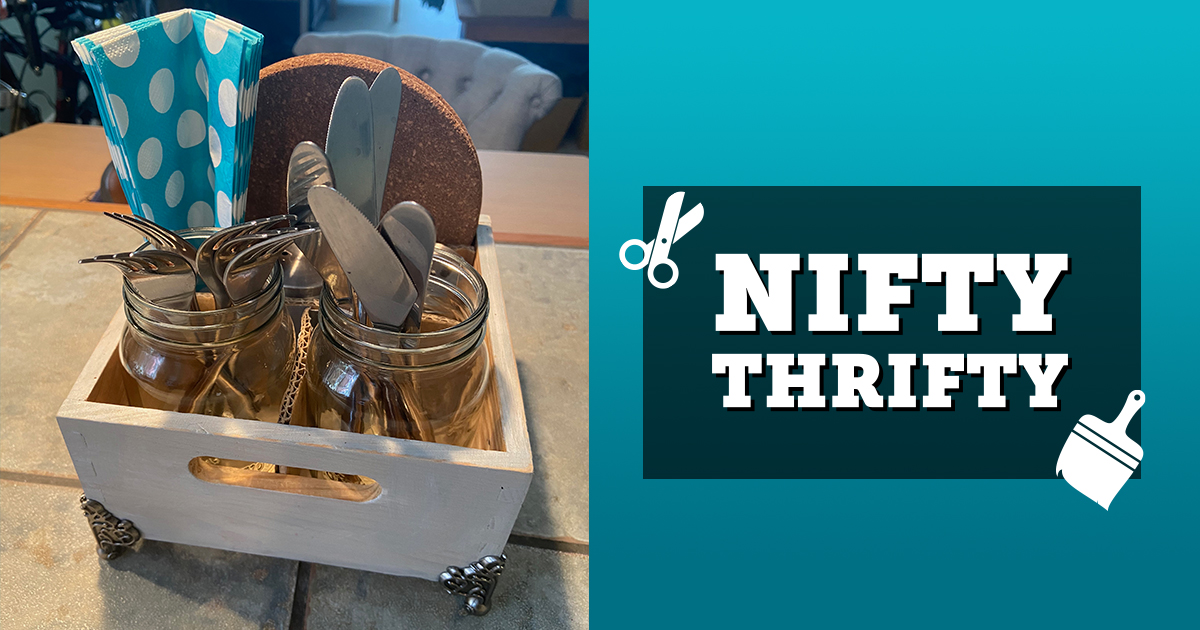
With autumn here and opportunities for family get-togethers, a utensil caddy makes the prep work easy peasy. And this DIY is simple to customize to your specific needs.
Supplies Needed: thrifted base for the caddy, cardboard, scissors, duct tape, Mason jars, spice containers or salt and pepper shakers, paint, paint brush or sponge.
Step 1 Visit your local Salvation Army thrift store for your caddy base. Look for a basic box that isn’t too big. You could also use an old bottle holder, toolbox or office organizer.
Step 2 Add some funk to your base. You could paint, decoupage, stencil or leave it as is.
Step 3 Gather the items you’ll be placing in the caddy. This will help you figure out how to organize the items in your caddy and map out the needed compartments.
Step 4 Repurpose cardboard to create an insert to go into your caddy. Measure the inside of your box and cut out the pieces of cardboard. (This is optional, but if you’re using glassware, use cardboard as a buffer between the items.) Once you’ve measured and cut out the pieces of cardboard, use duct tape to adhere all of your pieces.
Step 5 Insert the cardboard and place your items into each of the compartments. Next, add your cutlery, napkins, hot plates, spices, etc.
Feel free to add some funky embellishments—and some pizzazz—to your DIY cutlery caddy. I lucked out and found some box feet at my local Salvation Army thrift store, which I added to my caddy.
Denise Corcoran (aka Thrifty By Design) is an author, upcycler, community builder and workshop facilitator based in North Vancouver. She shares her enthusiasm for crafting and upcycling by facilitating “Crafternoons” throughout Vancouver. She is also a creative expert for The Salvation Army’s thrift stores. Find a thrift store near you at thriftstore.ca.
This story is from:


Leave a Comment