


As an avid hiker and forest bather, this was the perfect DIY for my home.
Supplies Needed: Thrifted frame, paint and paintbrush (optional), cardboard, corkboards, glue gun and glue sticks, moss.
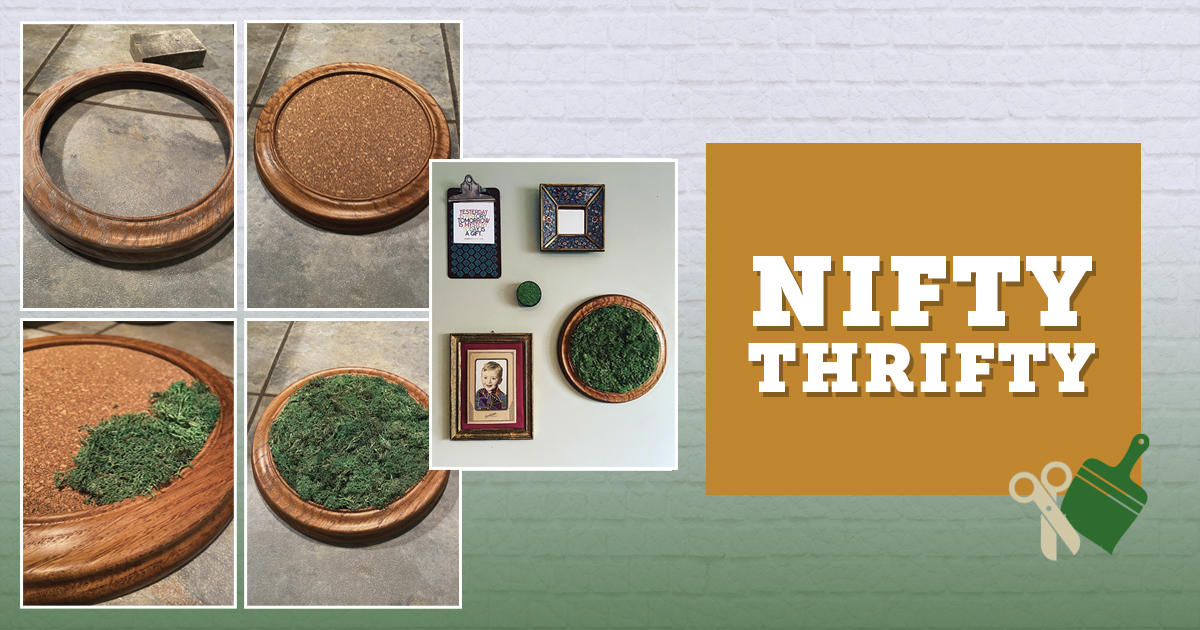
Step 1 Drop by your local Salvation Army thrift store to source a frame or container that would work for your DIY moss wall art. I found this circular wood frame.
Step 2 Clean your frame and refinish it if you prefer. I was going to paint mine, but the natural wood worked well with the moss. I sanded and oiled the frame, then was ready to get DIY-ing.
Step 3 I used a couple of pieces of cardboard then a piece of corkboard to insert into my frame. I added the cardboard and corkboard, sealed the back of my frame and was ready to start adding the moss.
You can always use a canvas insert or sponge, or just start with moss. Whatever works for you!
Step 4 Separate out all of the bigger pieces of moss. I started with big pieces for the base, then used the smaller pieces to fill in any gaps. Use your glue gun and start gluing the moss piece by piece to the inside of your frame.
Step 5 Keep layering moss until you’re happy with the design. I love the idea of upcycling and this feature piece on my wall was a simple and cost-effective project.
Denise Corcoran (aka Thrifty By Design) is an author, upcycler, community builder and workshop facilitator based in North Vancouver. She shares her enthusiasm for crafting and upcycling by facilitating “Crafternoons” throughout Vancouver. She is also a creative expert for The Salvation Army’s thrift stores. Find a thrift store near you at thriftstore.ca.
This story is from:


Leave a Comment